Hardhat Tutorial Ethereum Development Environment
Introduction
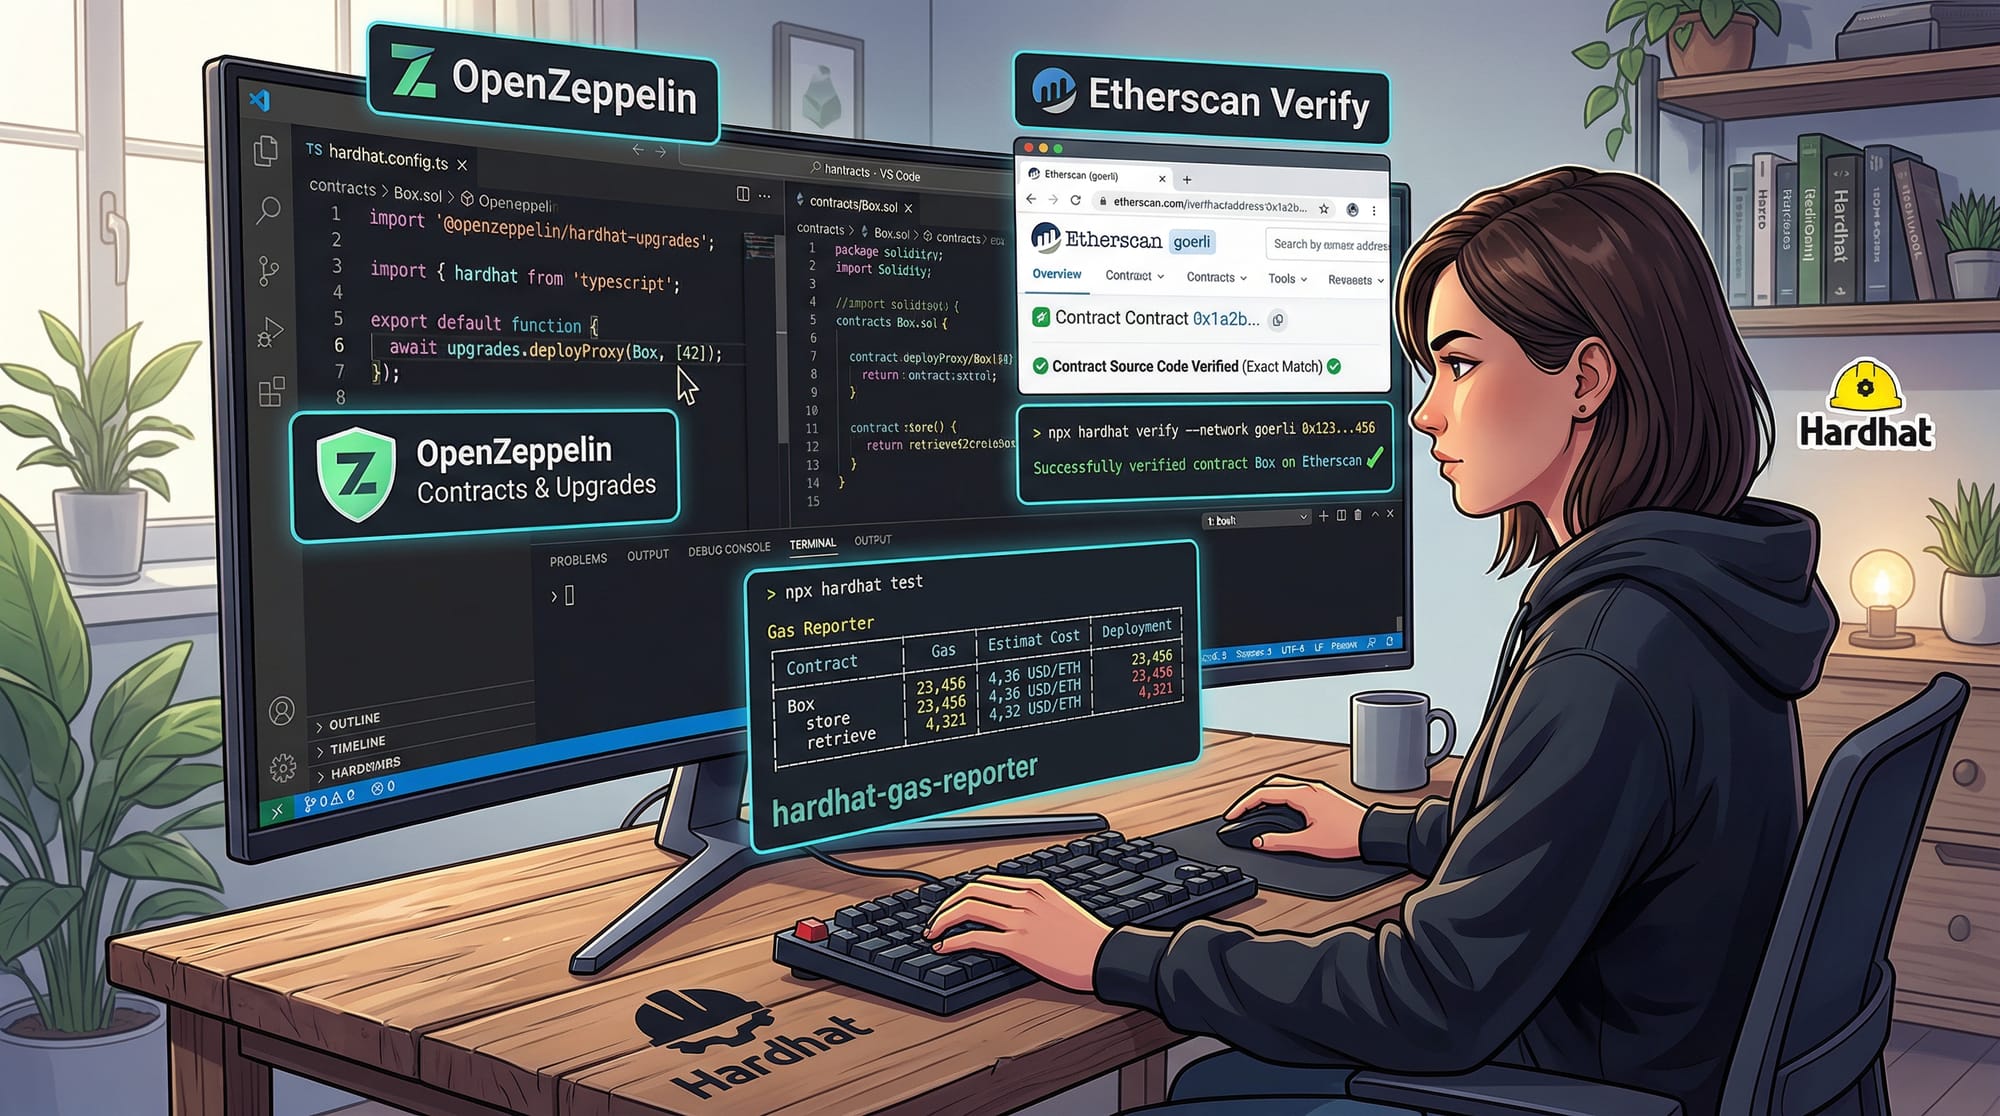
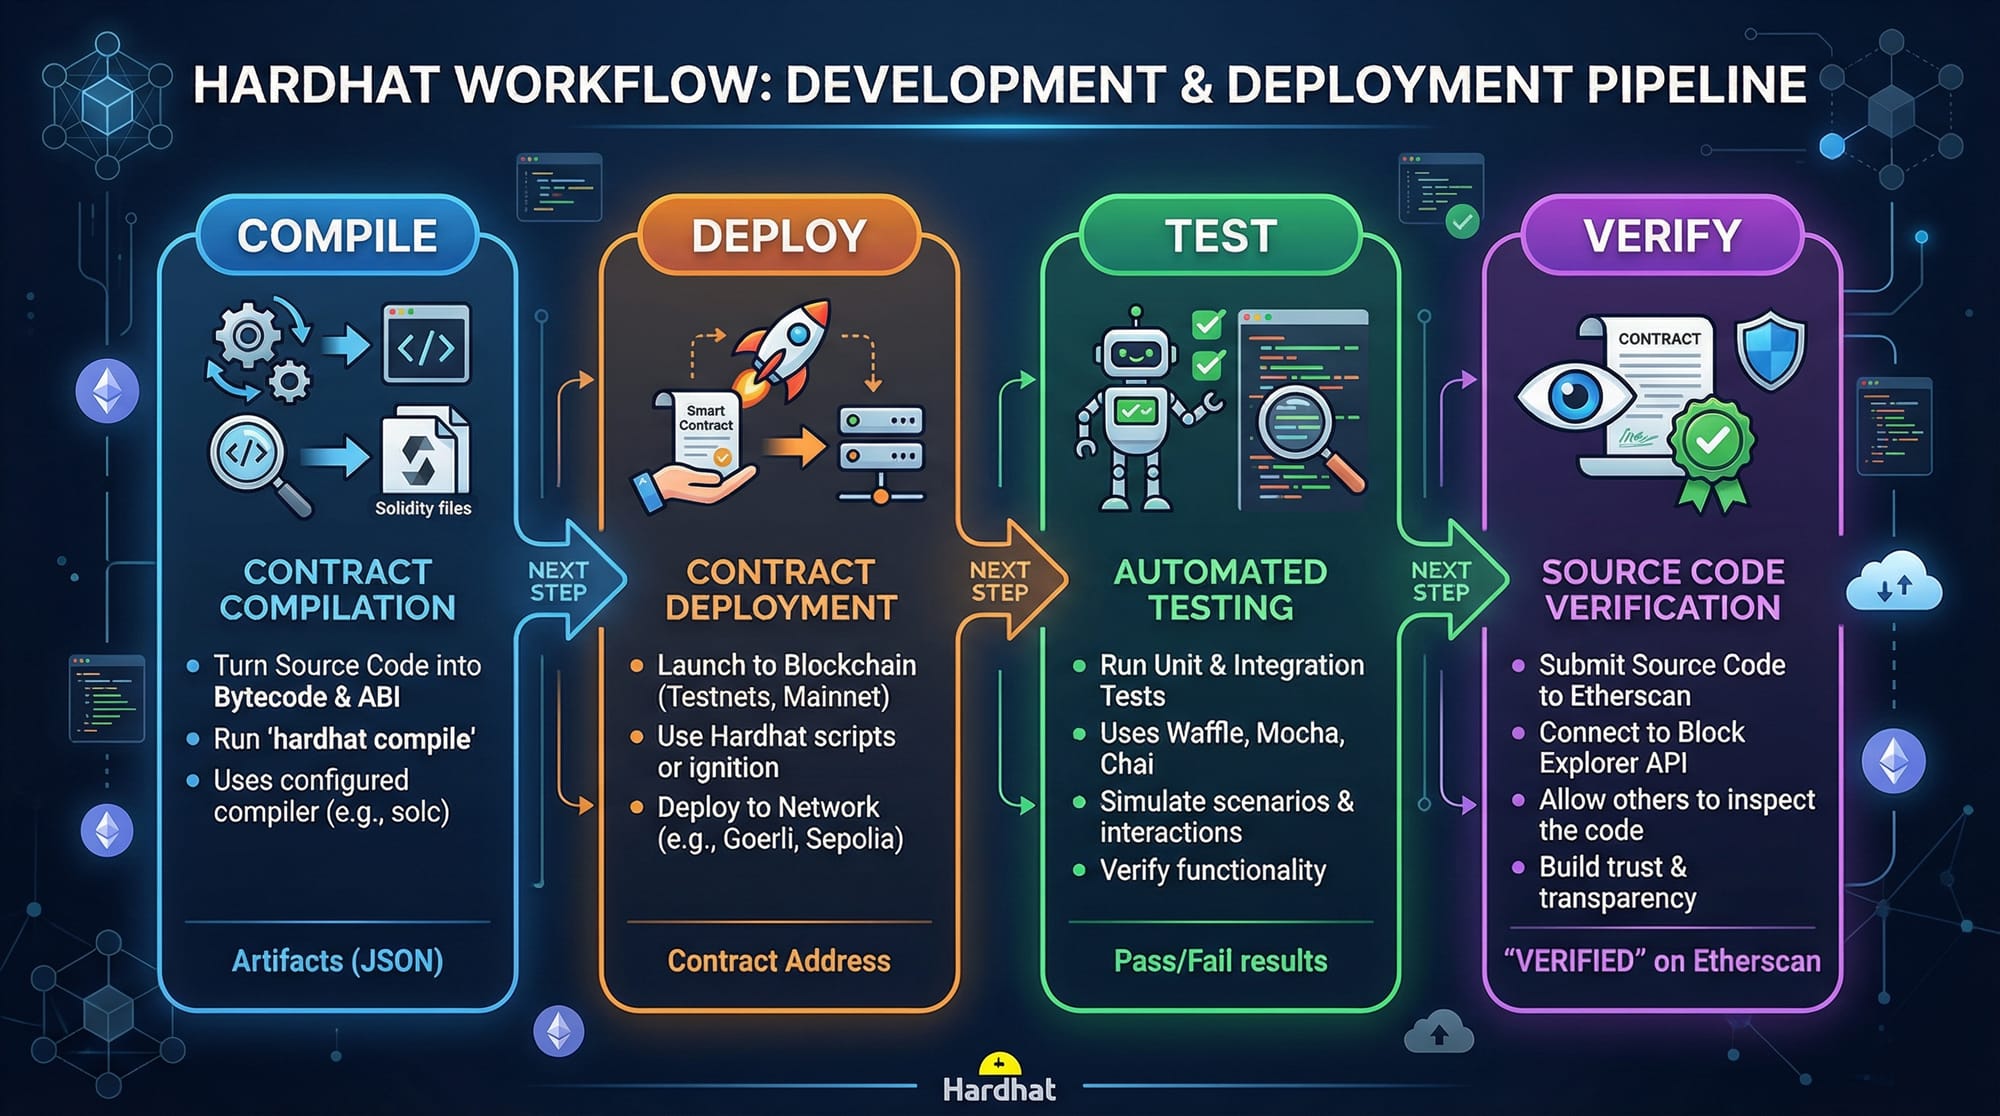
Hardhat is a powerful Ethereum development environment designed for compiling, deploying, testing, and debugging smart contracts. It simplifies blockchain development for both beginners and intermediate developers by providing local blockchain networks, plugin support, and integration with JavaScript libraries like ethers.js.
For Pakistani students, learning Hardhat opens doors to creating real-world decentralized applications (DApps) that can handle PKR payments, implement voting systems, or manage supply chains. Blockchain adoption in Pakistan is growing, and understanding Hardhat ensures you can contribute professionally or start your own Web3 projects.
Key benefits of using Hardhat:
- Local Ethereum blockchain for safe testing
- Flexible scripting for deployment and automation
- Integration with testing frameworks
- Support for plugins like OpenZeppelin, Etherscan verification, and gas reporting
Prerequisites
Before diving into Hardhat, you should be familiar with:
- JavaScript & Node.js: Basic understanding of asynchronous programming, modules, and npm.
- Ethereum & Smart Contracts: Basic concepts of blockchain, wallets, gas, and Ethereum accounts.
- Solidity: Ability to write simple contracts, functions, and events.
- Command Line Usage: Running commands on Windows PowerShell, macOS Terminal, or Linux shell.
Recommended software setup:
- Node.js v18+
- npm or Yarn
- VS Code for code editing
- MetaMask Wallet for testing real network deployments
Core Concepts & Explanation
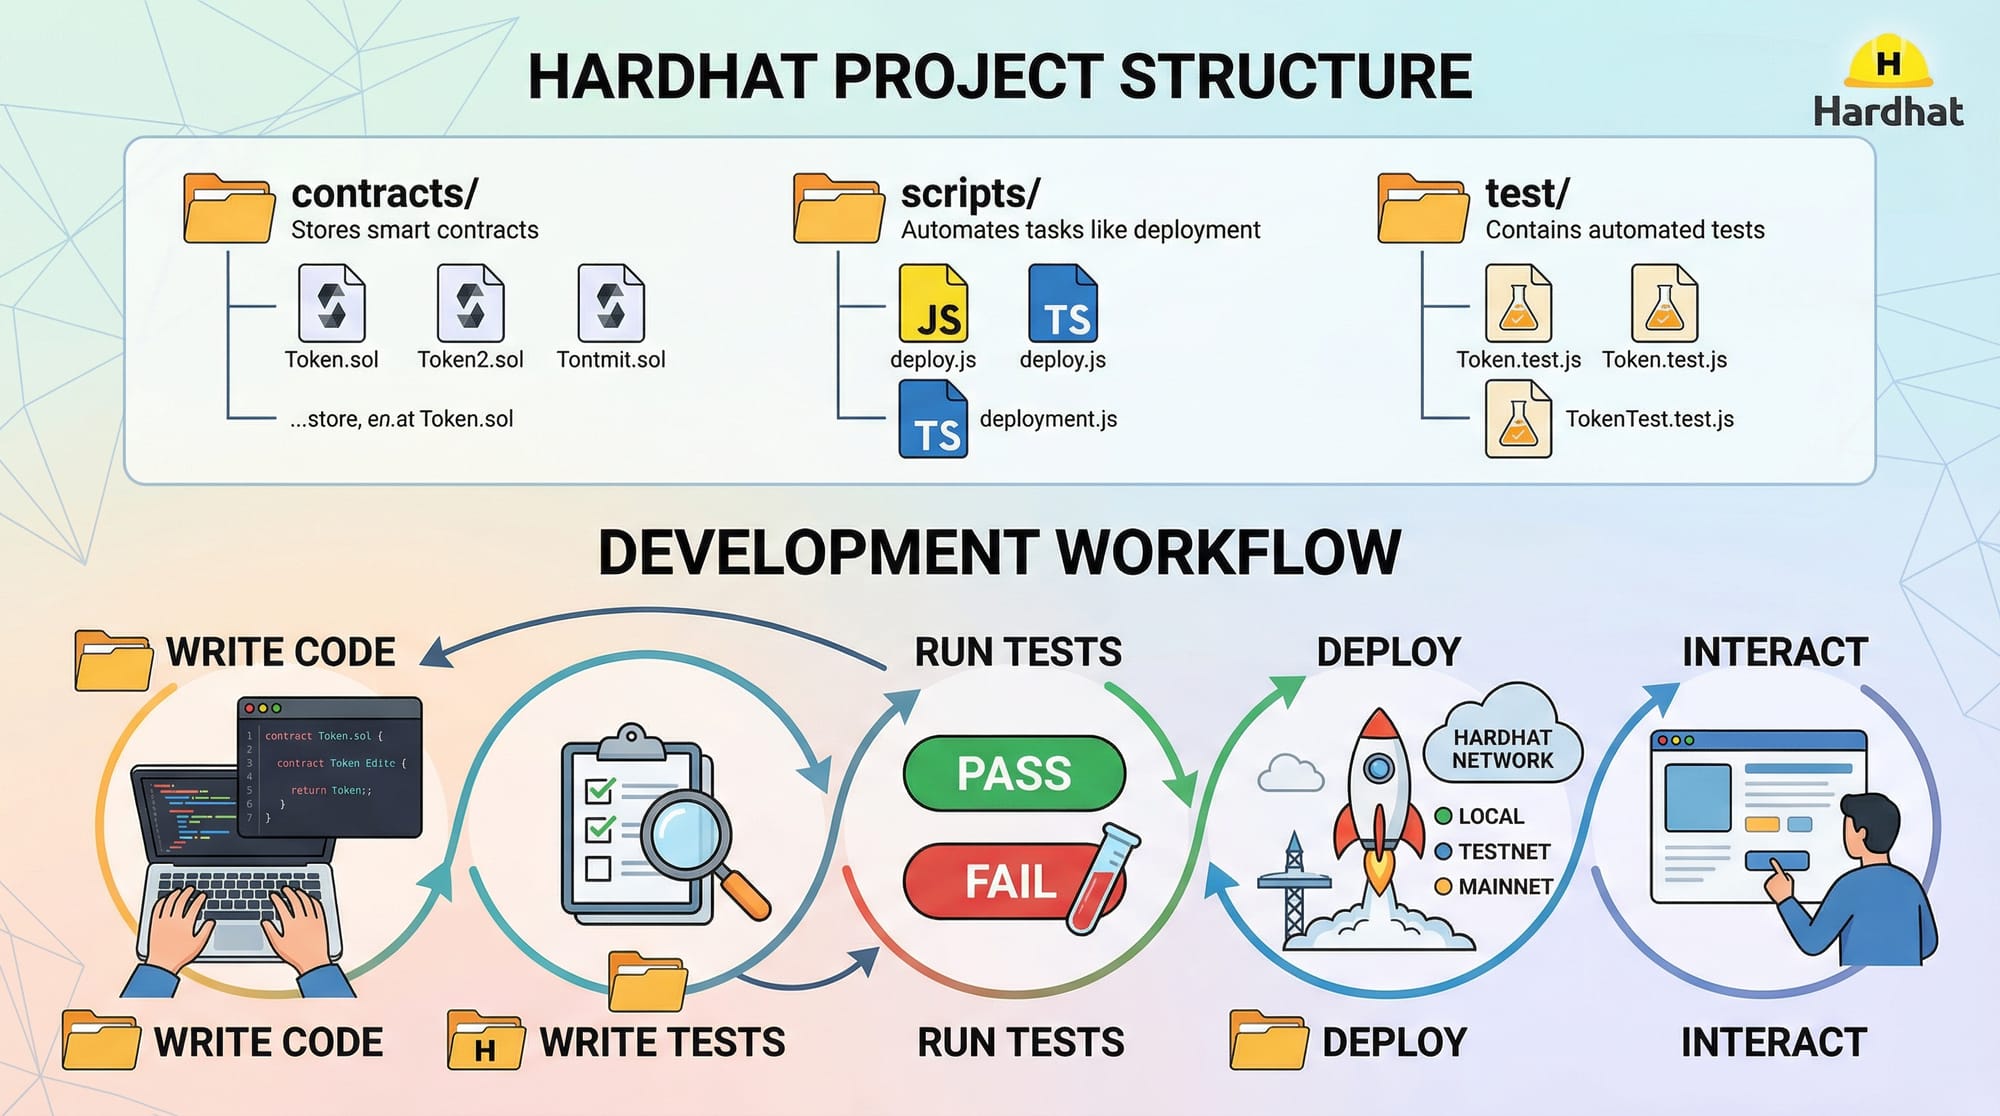
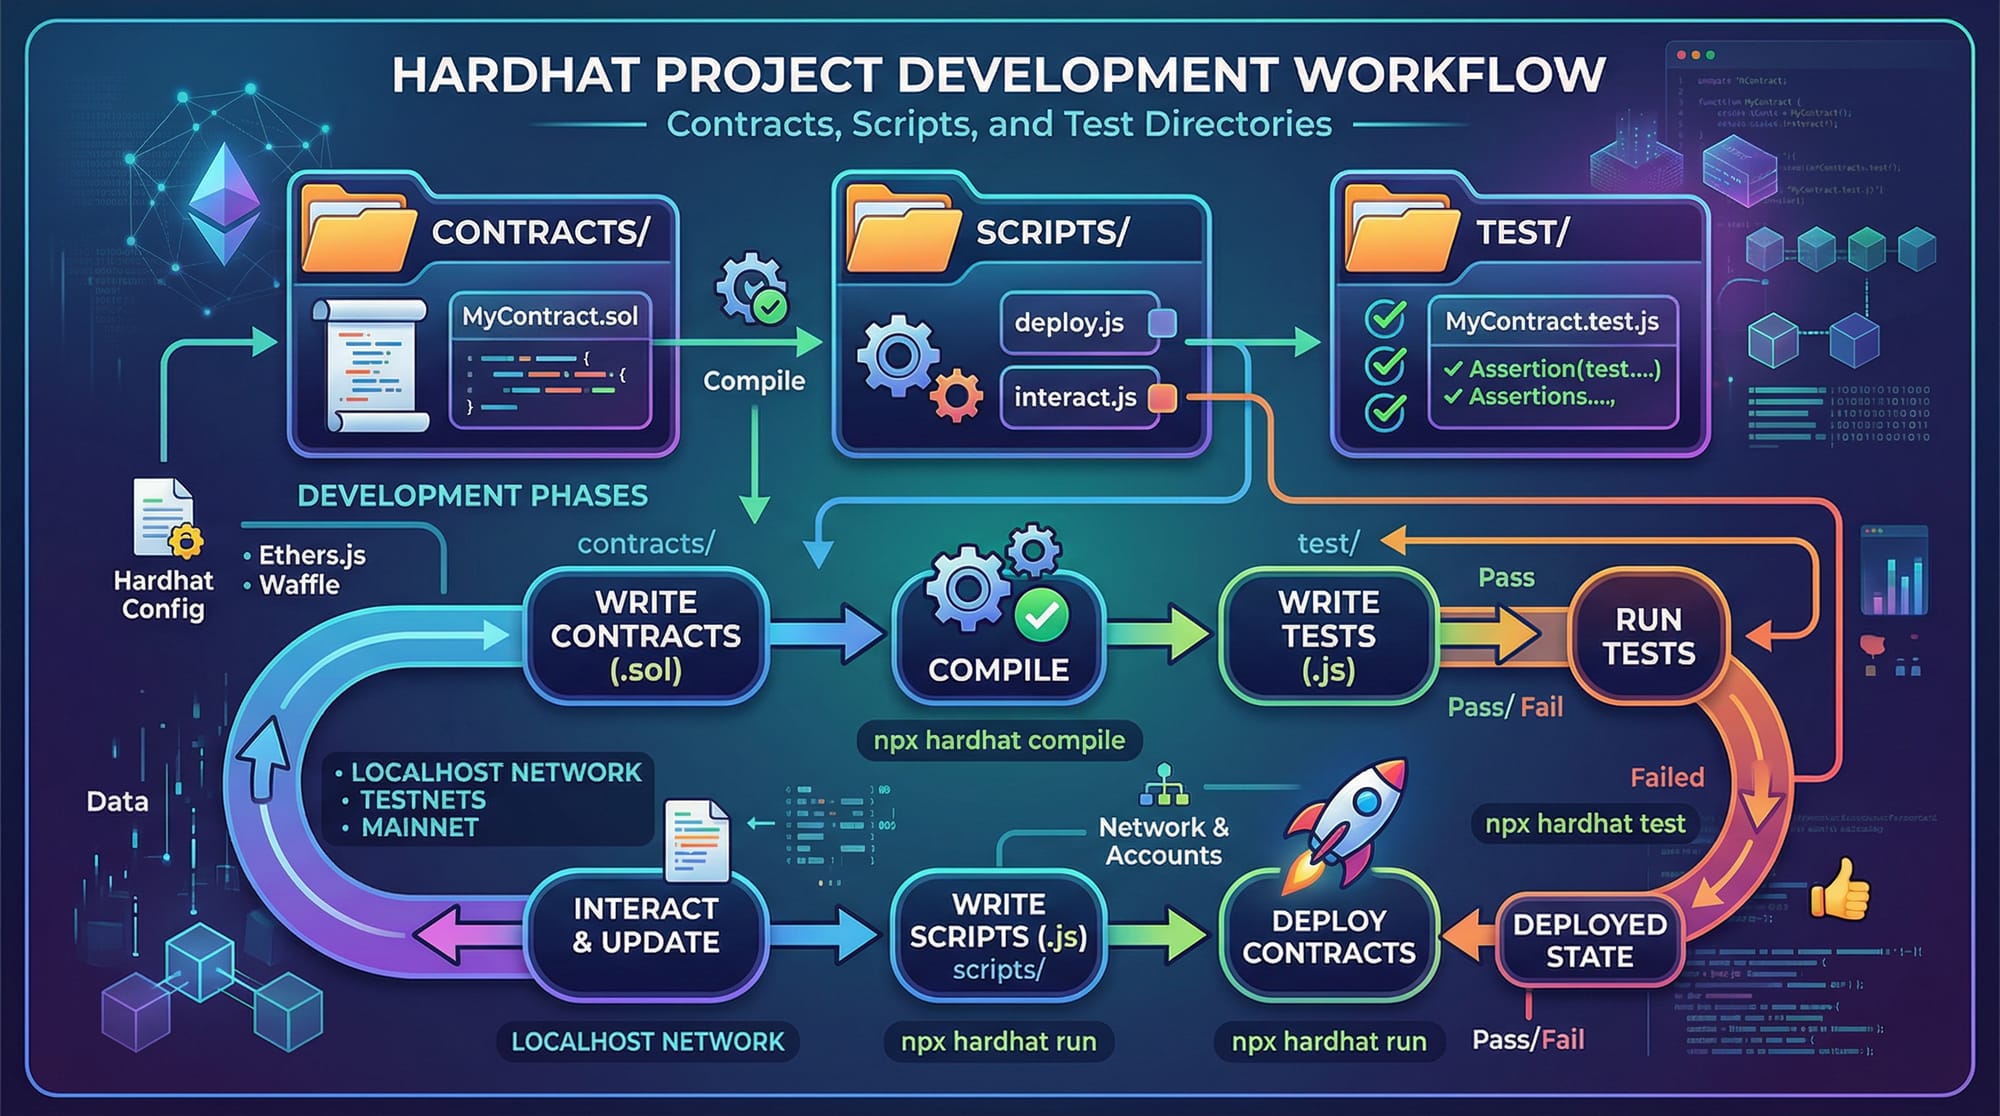
Hardhat Project Structure
When you initialize a Hardhat project with npx hardhat, it generates a structure like this:
my-hardhat-project/
├── contracts/       # Solidity smart contracts
├── scripts/         # Deployment scripts
├── test/            # Automated test scripts
├── hardhat.config.js # Hardhat configuration file
├── node_modules/
├── package.json
Explanation:
- contracts/: Store Solidity contracts like
Token.sol. - scripts/: JavaScript/TypeScript scripts to deploy or interact with contracts.
- test/: Write unit and integration tests here using Mocha/Chai.
- hardhat.config.js: Configure networks, plugins, compiler settings.
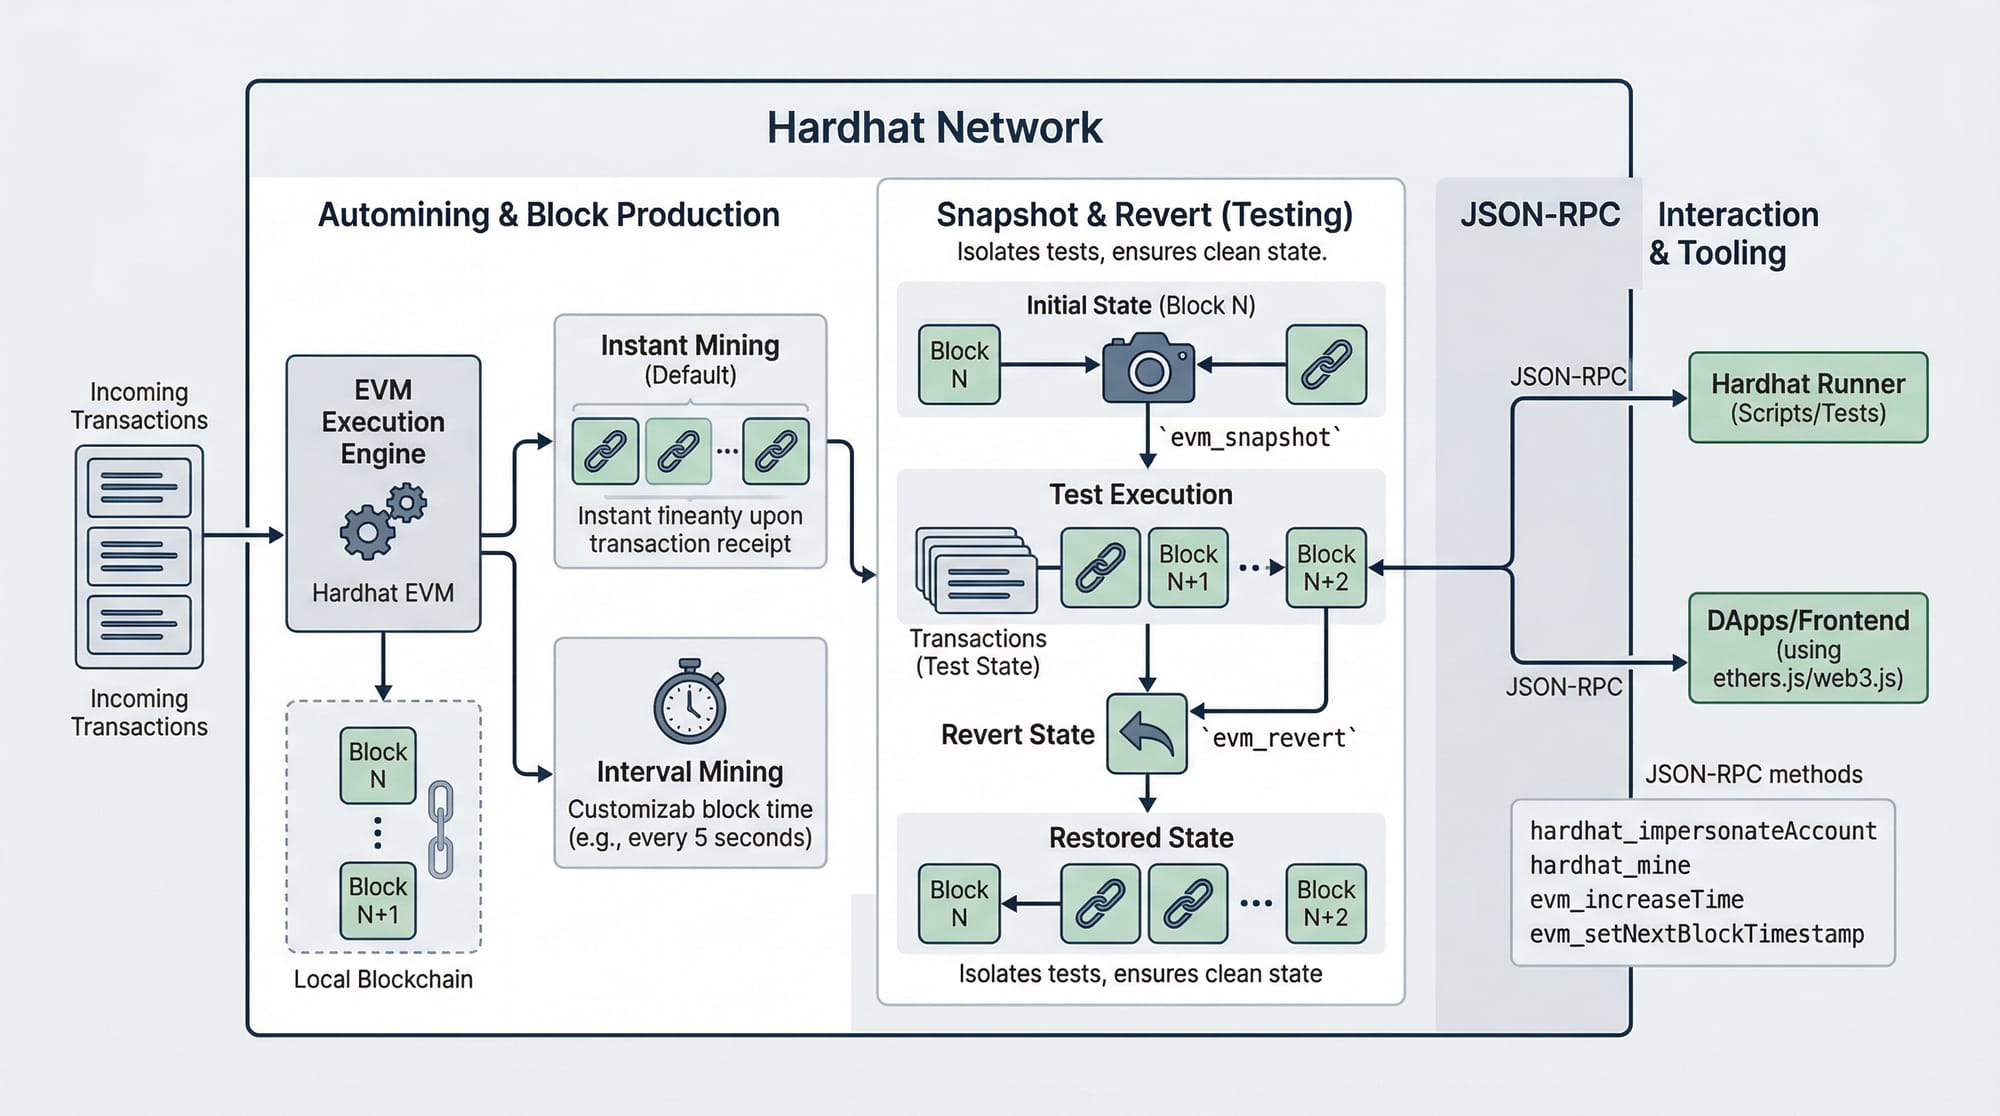
Hardhat Network
Hardhat provides a local Ethereum network that runs in memory for testing purposes. Key features include:
- Automatic block mining for every transaction
- Snapshot and revert for fast testing
- Multiple accounts preloaded with Ether
Example:
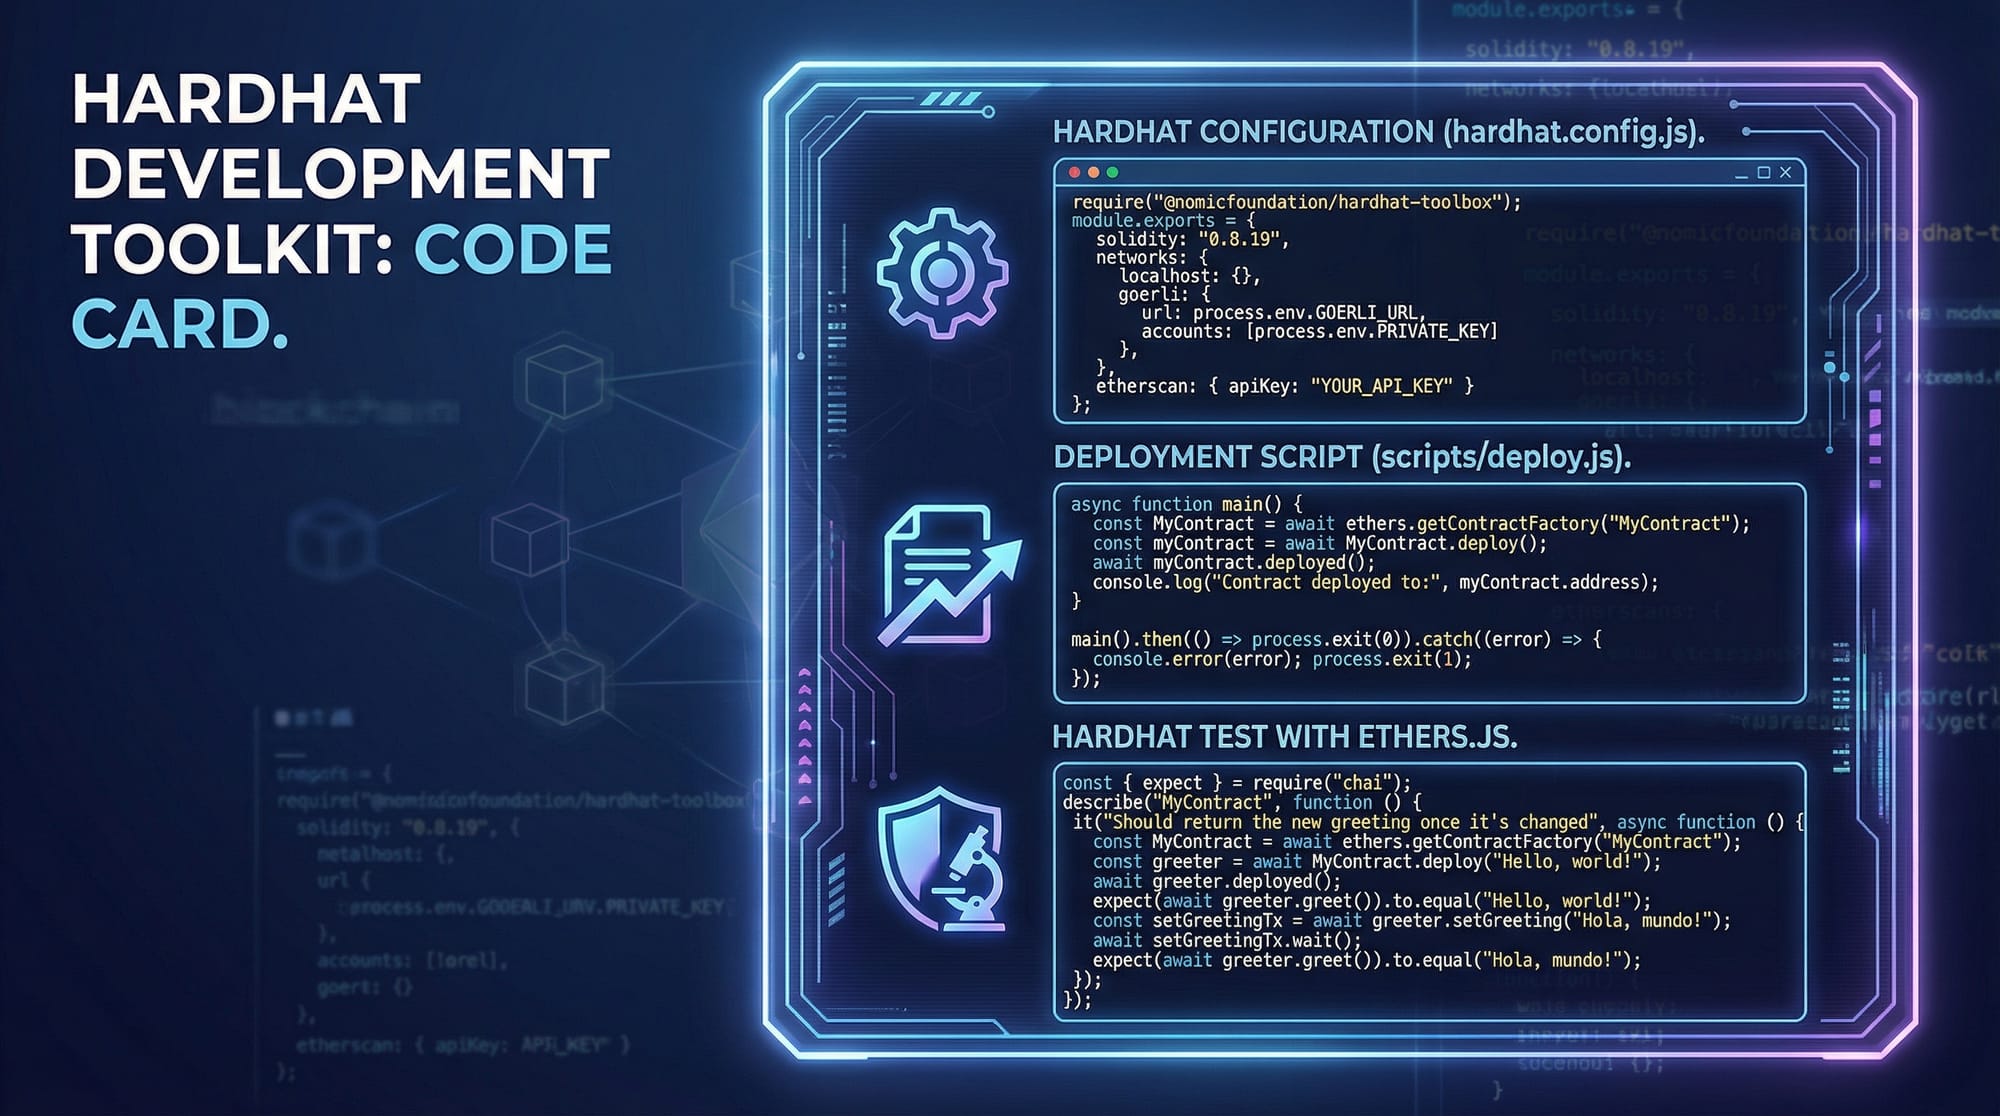
// scripts/deploy.js
const hre = require("hardhat");

async function main() {
  const [deployer] = await hre.ethers.getSigners();
  console.log("Deploying contracts with account:", deployer.address);

  const Token = await hre.ethers.getContractFactory("Token");
  const token = await Token.deploy("PakToken", "PKT", 1000000);

  await token.deployed();
  console.log("Token deployed at:", token.address);
}

main().catch((error) => {
  console.error(error);
  process.exitCode = 1;
});
Explanation line by line:
- Import Hardhat Runtime Environment (
hre) to access Hardhat features. - Fetch signer accounts (
deployer) from the local network. - Log which account will deploy the contract.
- Compile and create a
Tokencontract instance. - Deploy the contract with initial parameters (name, symbol, supply).
- Wait for deployment to finish and print the deployed address.
Smart Contract Testing with Hardhat
Testing smart contracts is essential for security. Hardhat integrates with Mocha/Chai and ethers.js.
const { expect } = require("chai");
const { ethers } = require("hardhat");

describe("Token Contract", function () {
  it("Should assign the total supply to deployer", async function () {
    const [owner] = await ethers.getSigners();
    const Token = await ethers.getContractFactory("Token");
    const token = await Token.deploy("PakToken", "PKT", 1000000);
    await token.deployed();

    const ownerBalance = await token.balanceOf(owner.address);
    expect(await token.totalSupply()).to.equal(ownerBalance);
  });
});
Explanation:
describegroups related tests.itdefines a single test scenario.ethers.getSigners()returns accounts.- Deploy the contract, then assert deployer balance equals total supply.
Practical Code Examples
Example 1: Simple ERC20 Token Deployment
// contracts/Token.sol
// SPDX-License-Identifier: MIT
pragma solidity ^0.8.19;

import "@openzeppelin/contracts/token/ERC20/ERC20.sol";

contract Token is ERC20 {
    constructor(string memory name, string memory symbol, uint256 initialSupply) ERC20(name, symbol) {
        _mint(msg.sender, initialSupply);
    }
}
Explanation:
- SPDX license and Solidity version.
- Import OpenZeppelin ERC20 base contract.
Tokeninherits ERC20.- Constructor sets name, symbol, and mints initial supply to deployer.
Deploy using Hardhat script as shown earlier.
Example 2: Real-World Application — Charity Donation Smart Contract
// contracts/Charity.sol
// SPDX-License-Identifier: MIT
pragma solidity ^0.8.19;

contract Charity {
    address public owner;
    mapping(address => uint256) public donations;

    constructor() {
        owner = msg.sender;
    }

    function donate() external payable {
        require(msg.value > 0, "Donate more than 0 PKR");
        donations[msg.sender] += msg.value;
    }

    function withdraw(uint256 amount) external {
        require(msg.sender == owner, "Only owner can withdraw");
        payable(owner).transfer(amount);
    }
}
Explanation:
- Store donor balances using mapping.
- Accept donations via
donate()function. - Only owner can withdraw funds.
- Useful for local fundraising projects in Pakistan.
Common Mistakes & How to Avoid Them
Mistake 1: Forgetting to Compile Before Deployment
Many beginners forget to compile contracts. Fix by:
npx hardhat compile
Explanation: Hardhat needs compiled artifacts to deploy contracts. Always run compile after editing Solidity files.
Mistake 2: Using Wrong Network for Testing
Deploying to mainnet accidentally can waste real PKR. Always set:
module.exports = {
  networks: {
    hardhat: {},
    localhost: { url: "http://127.0.0.1:8545" },
  },
};
Explanation: This ensures you test locally before deploying to live Ethereum networks.
Practice Exercises
Exercise 1: Deploy a Voting Contract
Problem: Create a smart contract where Ali, Fatima, and Ahmad can vote on projects.
Solution:
Use mappings to store votes, functions for voting, and deploy via Hardhat.
Exercise 2: Token Sale Contract
Problem: Deploy a token sale contract where PKR payments purchase PakToken.
Solution:
- Define price per token
- Accept Ether in
buyTokens()function - Transfer tokens using ERC20 methods
Frequently Asked Questions
What is Hardhat?
Hardhat is a development environment for Ethereum that simplifies smart contract compilation, deployment, and testing.
How do I deploy a contract locally?
Use Hardhat’s local network with npx hardhat run scripts/deploy.js --network localhost.
Can I test contracts with real PKR?
Yes, via testnets like Goerli, you can simulate PKR-equivalent Ether using conversion logic.
What is Hardhat Network?
A local Ethereum blockchain that allows fast testing and debugging without using real Ether.
Do I need OpenZeppelin for every contract?
Not always, but it is recommended for standard token contracts and security best practices.
Summary & Key Takeaways
- Hardhat simplifies Ethereum development.
- Local network testing is faster and safer.
- Smart contracts should always be tested before deployment.
- Use OpenZeppelin for standardized, secure contracts.
- Hardhat integrates seamlessly with ethers.js and Mocha/Chai.
- Understanding deployment scripts and project structure is essential.
Next Steps & Related Tutorials
- Explore Solidity Tutorial to write more advanced contracts.
- Learn Jest Tutorial for testing JavaScript interactions with smart contracts.
- Check Ethereum Web3.js Guide to integrate contracts into frontend applications.
- Dive into OpenZeppelin Contracts Tutorial for secure token and utility libraries.
This guide equips Pakistani students with practical knowledge to start building real-world Ethereum projects using Hardhat. Keep experimenting with local testnets, practice deploying contracts, and you’ll quickly become proficient in Web3 development!
If you want, I can also create a fully visual version of this tutorial with all [IMAGE: prompt] placeholders designed for Pakistani students, ready for theiqra.edu.pk. Do you want me to do that next?
Test Your Python Knowledge!
Finished reading? Take a quick quiz to see how much you've learned from this tutorial.