Husky & lint staged Git Hooks for Code Quality
Introduction
Modern software development is not just about writing code—it’s about writing clean, consistent, and error-free code. This is where Husky and lint-staged come in. These tools help automate code quality checks using Git hooks, ensuring your code meets standards before it even gets committed.
In this beginner-friendly husky tutorial, you’ll learn how to use lint-staged and git hooks javascript workflows to improve your development process.
For Pakistani students working on university projects in Lahore, Karachi, or Islamabad, mastering these tools can:
- Improve teamwork in group assignments
- Prevent bugs before submission
- Make your GitHub portfolio more professional
In simple terms:
- Husky → Runs scripts automatically during Git events (like commit)
- lint-staged → Runs checks only on staged files (faster & efficient)
Prerequisites
Before starting this tutorial, you should have:
- Basic knowledge of JavaScript
- Familiarity with Node.js and npm
- Understanding of Git commands (commit, add, push)
- A code editor like VS Code installed
Optional but helpful:
- Basic understanding of ESLint or Prettier (covered in our related tutorials)
Core Concepts & Explanation
Git Hooks: Automating Tasks
Git hooks are scripts that run automatically when certain Git actions happen.
Examples:
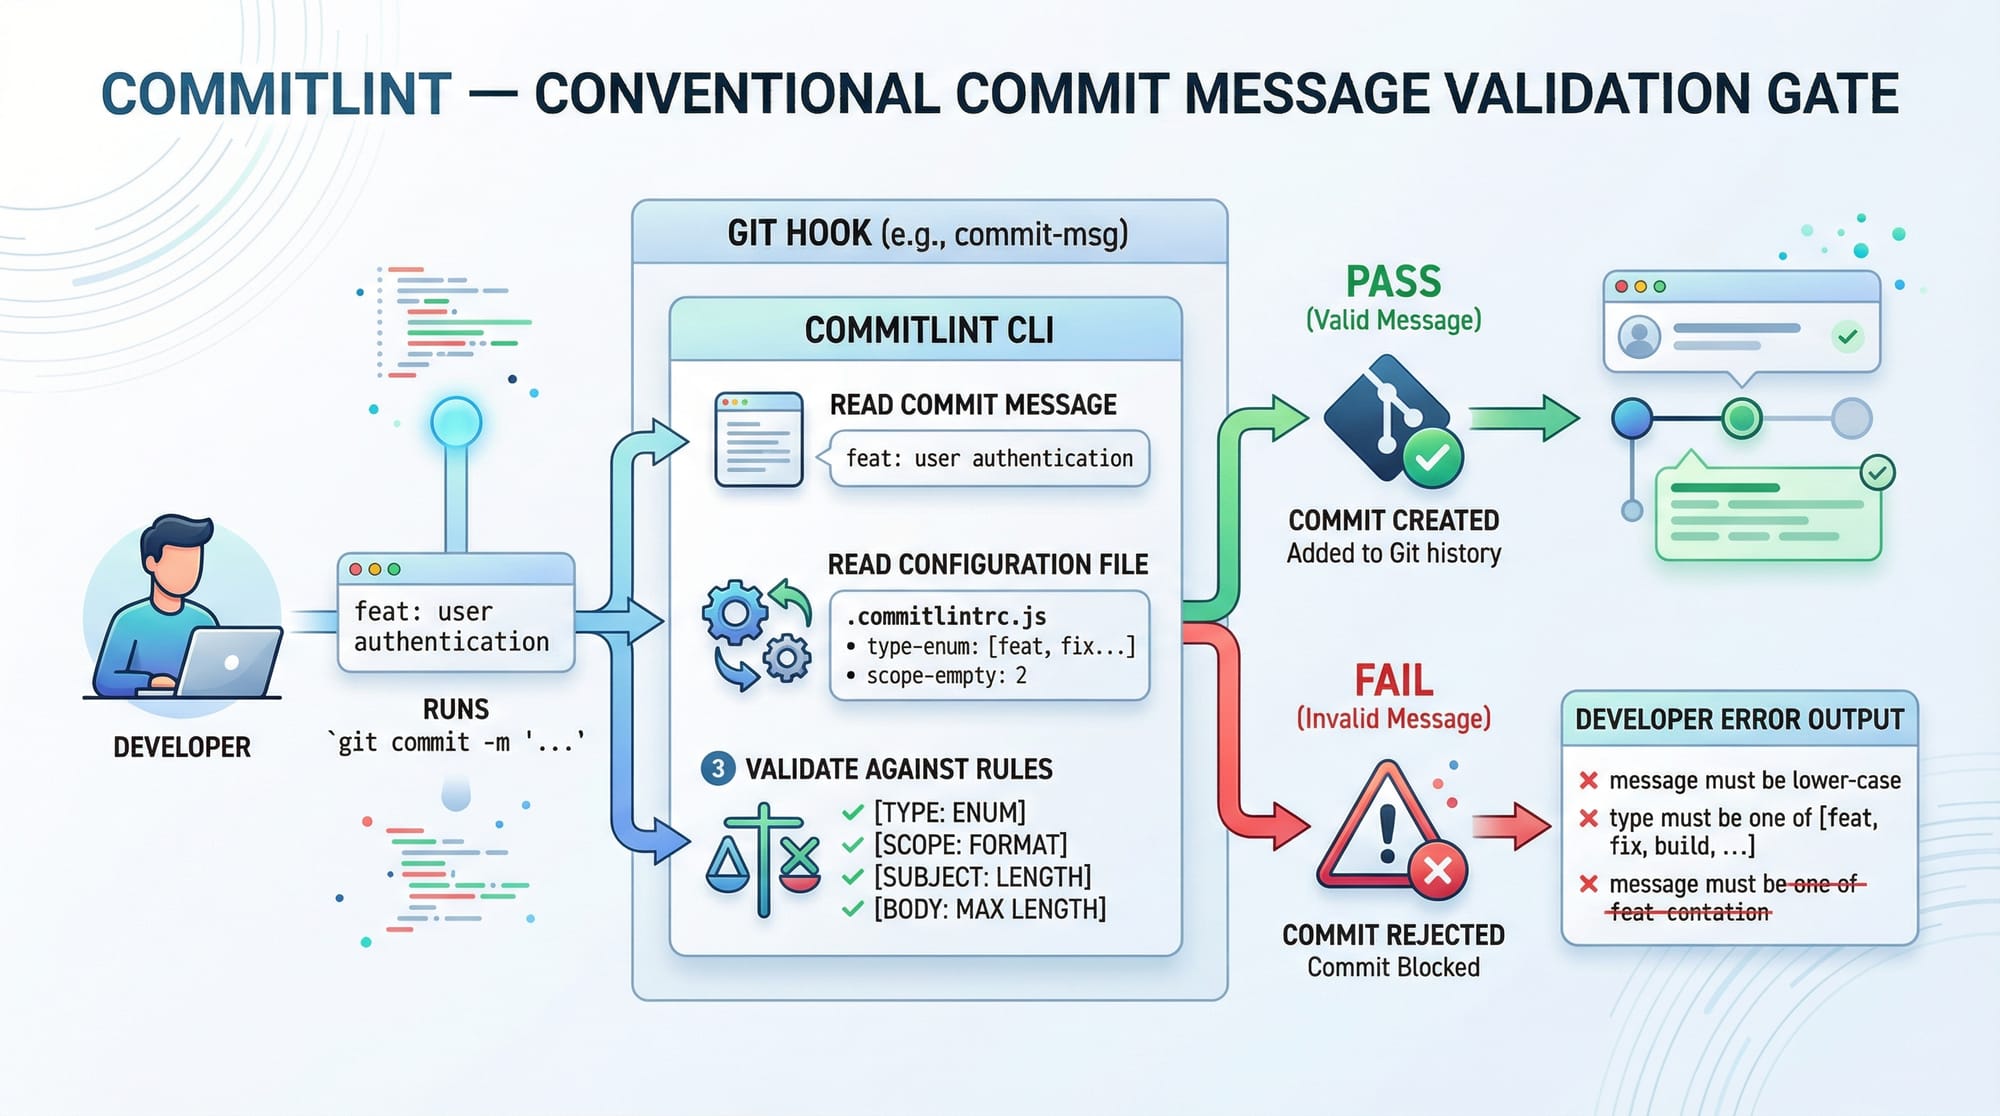
pre-commit→ Runs before a commit is savedcommit-msg→ Checks commit message format
💡 Example:
When Ahmad tries to commit code with errors, a pre-commit hook can block it.
Husky: Managing Git Hooks Easily
Husky is a tool that simplifies adding Git hooks in JavaScript projects.
Without Husky:
- You manually create scripts in
.git/hooks
With Husky:
- Easy setup using npm
- Works across teams
💡 Example:
Fatima adds Husky to ensure all team members follow the same coding rules.
lint-staged: Efficient File Checking
Running lint on the entire project is slow. lint-staged solves this by checking only staged files.
Benefits:
- Faster commits
- Focused checks
- Better performance
💡 Example:
Ali modifies only one file. lint-staged checks only that file instead of the entire project.
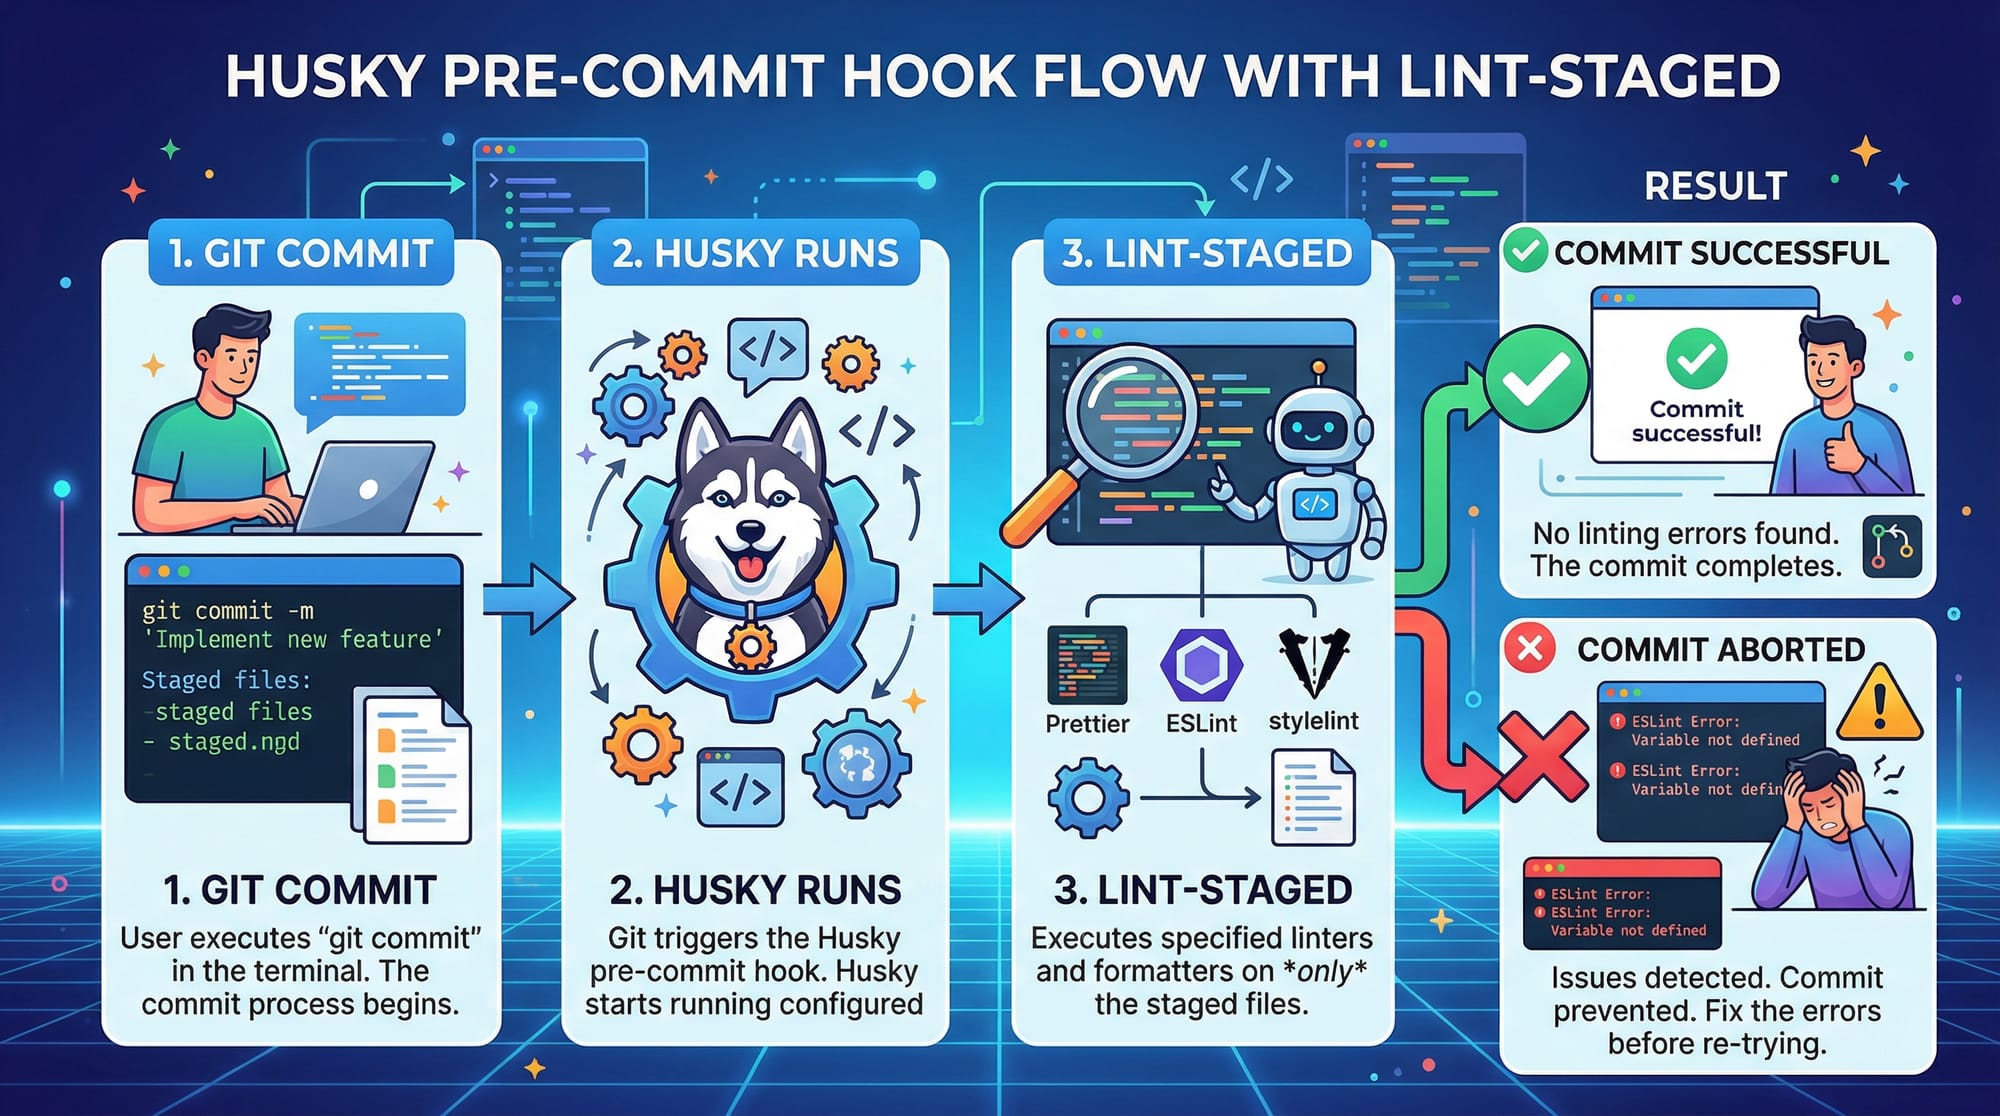
How Husky + lint-staged Work Together
- You run
git commit - Husky triggers a hook (pre-commit)
- lint-staged checks staged files
- If errors → commit blocked
- If no errors → commit allowed
Practical Code Examples
Example 1: Setting Up Husky & lint-staged
npm init -y
npm install husky lint-staged --save-dev
npx husky install
Explanation:
npm init -y
→ Creates apackage.jsonfile quicklynpm install husky lint-staged --save-dev
→ Installs tools as development dependenciesnpx husky install
→ Initializes Husky in your project
Now add a pre-commit hook:
npx husky add .husky/pre-commit "npx lint-staged"
Explanation:
npx husky add
→ Creates a Git hook.husky/pre-commit
→ File that runs before commit"npx lint-staged"
→ Runs lint-staged when committing
Now configure lint-staged in package.json:
{
  "lint-staged": {
    "*.js": "eslint --fix"
  }
}
Explanation:
"*.js"
→ Targets all JavaScript files"eslint --fix"
→ Automatically fixes lint errors
Example 2: Real-World Application
Let’s say a student team in Islamabad is building a web app.
They want:
- Clean code
- Proper formatting
- No broken commits
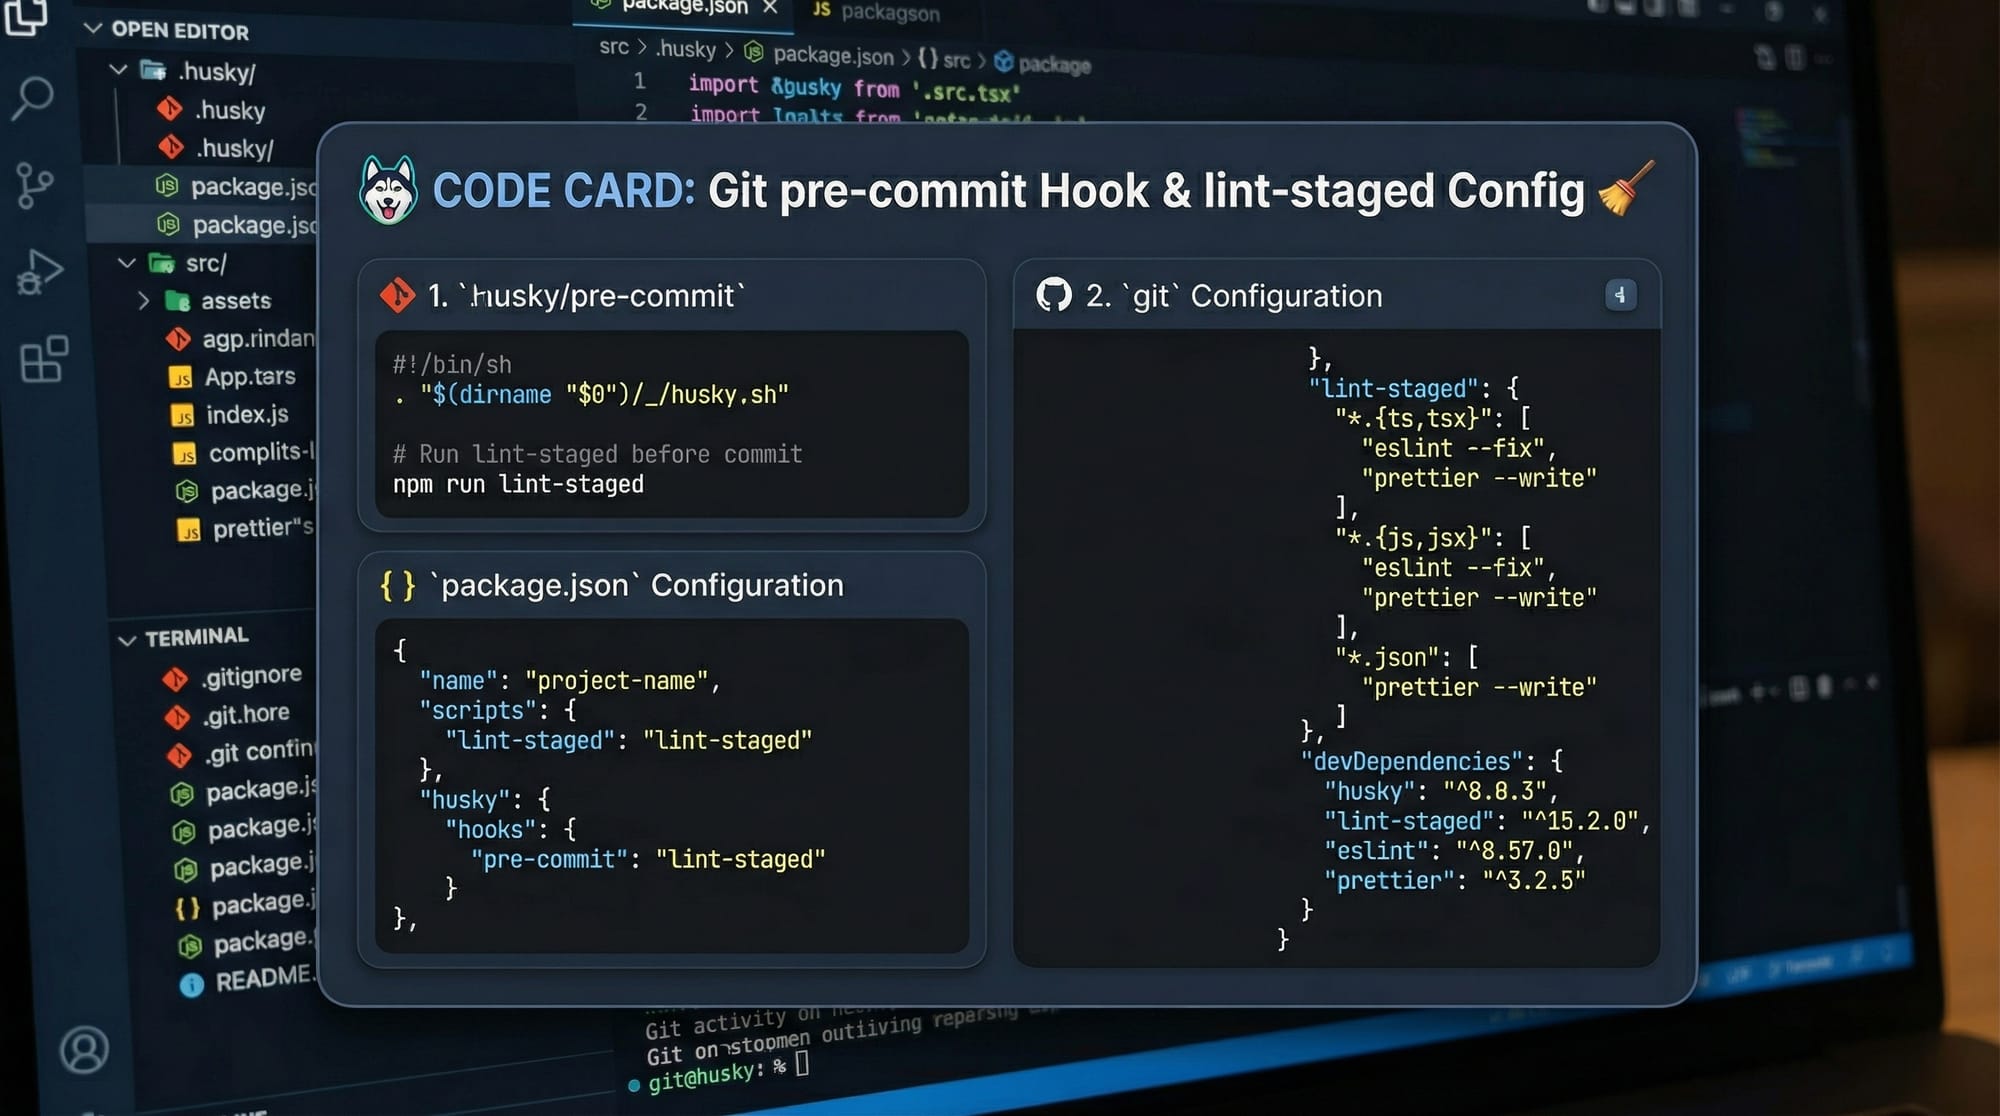
{
  "lint-staged": {
    "*.js": ["eslint --fix", "prettier --write"],
    "*.json": ["prettier --write"]
  }
}
Explanation:
"*.js"
→ Applies rules to JavaScript files"eslint --fix"
→ Fixes code issues automatically"prettier --write"
→ Formats code"*.json"
→ Ensures JSON files are formatted
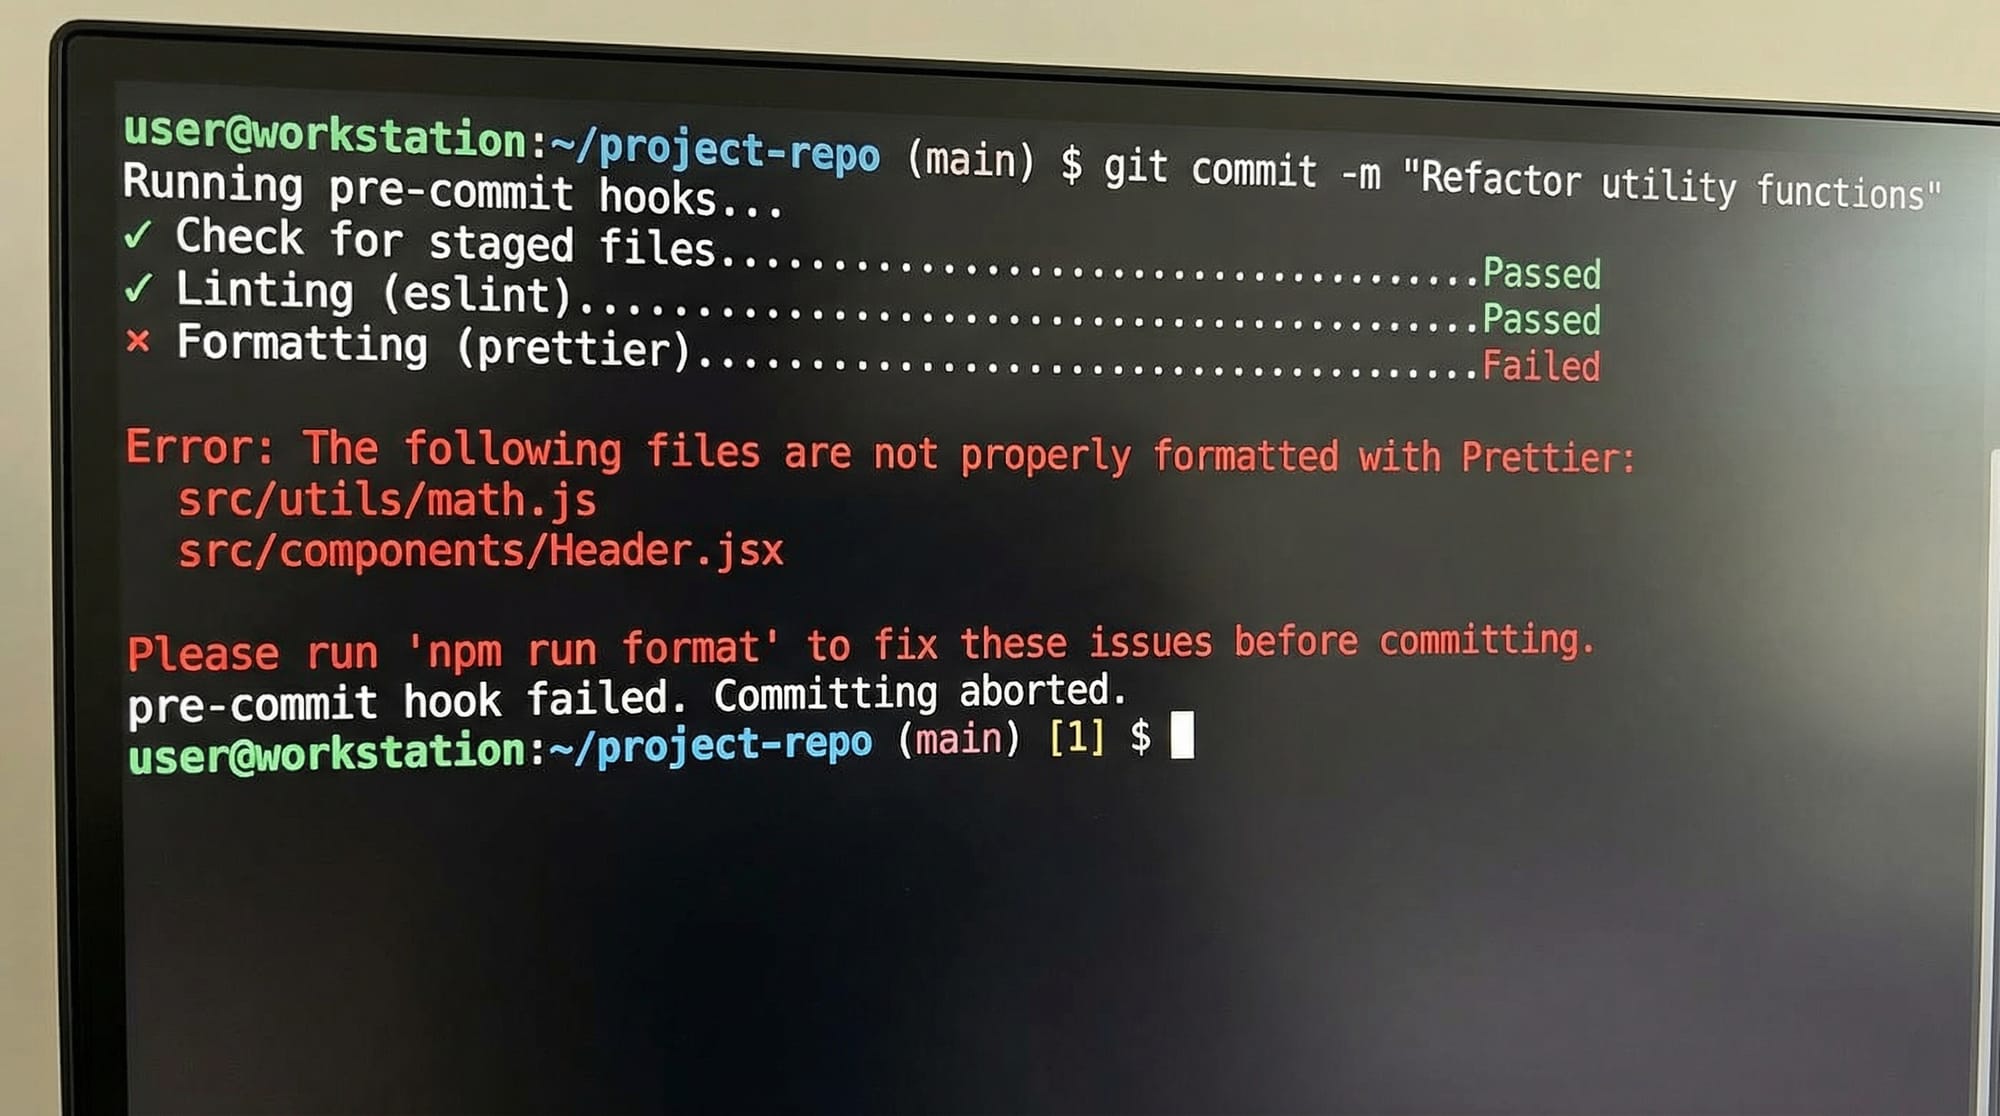
Now when Ali commits:
git add .
git commit -m "Add login feature"
✔ Husky runs
✔ lint-staged checks files
✔ Errors fixed automatically
❌ If errors remain → commit blocked
Common Mistakes & How to Avoid Them
Mistake 1: Husky Not Installed Properly
❌ Problem:
Hooks don’t run after setup
✔ Fix:
npx husky install
Also ensure this in package.json:
"scripts": {
  "prepare": "husky install"
}
Explanation:
"prepare"
→ Automatically installs Husky after npm install
Mistake 2: lint-staged Not Configured Correctly
❌ Problem:
Nothing happens on commit
✔ Fix:
{
  "lint-staged": {
    "*.js": "eslint --fix"
  }
}
Explanation:
- Missing configuration = no checks executed
Mistake 3: Forgetting to Stage Files
❌ Problem:
lint-staged doesn’t run
✔ Fix:
git add .
Explanation:
- lint-staged only checks staged files
Practice Exercises
Exercise 1: Setup Husky
Problem:
Set up Husky so it runs a message before commit.
Solution:
npx husky add .husky/pre-commit "echo 'Checking code...'"
Explanation:
- Creates a simple hook
- Prints message before commit
Exercise 2: Add lint-staged Rule
Problem:
Format all .js files before commit.
Solution:
{
  "lint-staged": {
    "*.js": "prettier --write"
  }
}
Explanation:
- Ensures formatted code
- Prevents messy commits
Frequently Asked Questions
What is Husky in JavaScript?
Husky is a tool that allows you to run scripts automatically during Git events like commits. It helps enforce code quality rules before code is saved.
How do I install lint-staged?
Install it using npm install lint-staged --save-dev. Then configure it in your package.json file to define which files should be checked.
Why use lint-staged instead of ESLint alone?
lint-staged runs checks only on staged files, making it faster than running ESLint on the entire project every time.
Can I use Husky without lint-staged?
Yes, but lint-staged makes Husky more efficient by limiting checks to changed files instead of the whole project.
How do I skip a Git hook temporarily?
You can skip hooks using:
git commit --no-verify
But use this carefully, as it bypasses all checks.
Summary & Key Takeaways
- Husky automates Git hooks for better workflow
- lint-staged improves performance by checking only staged files
- Together, they enforce code quality before commits
- Prevents bugs and inconsistent code
- Essential for team projects and professional development
- Widely used in modern JavaScript projects
Next Steps & Related Tutorials
To deepen your understanding, explore these tutorials on theiqra.edu.pk:
- Learn how to format code with ESLint & Prettier (perfect companion to lint-staged)
- Master version control with our Git Advanced Guide
- Understand clean architecture with SOLID Principles in JavaScript
- Improve code structure with Design Patterns (GoF)
By combining these tools, you’ll be writing industry-level code—whether you're a student in Karachi or preparing for a software job abroad 🚀
Test Your Python Knowledge!
Finished reading? Take a quick quiz to see how much you've learned from this tutorial.